Photoshop Tutorial: Smoking Head Effect
Photoshop Tutorial: Smoking Head Effect
In this tutorial, I will show you how to create smoking head effect. Let’s get started!

Step 1: Open your image
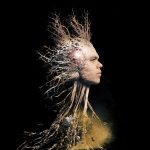
Start by opening your image into Photoshop. I’ll use this image from pexels:

The original photo. Credit: pixabay
Step 2: Create a Shape around the collar
Select Pen tool and drawing a shape around the man’s collar.
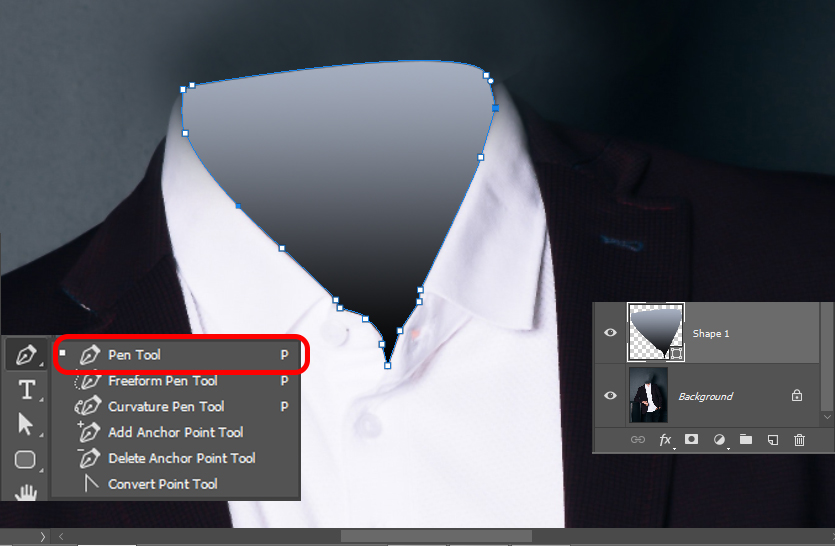
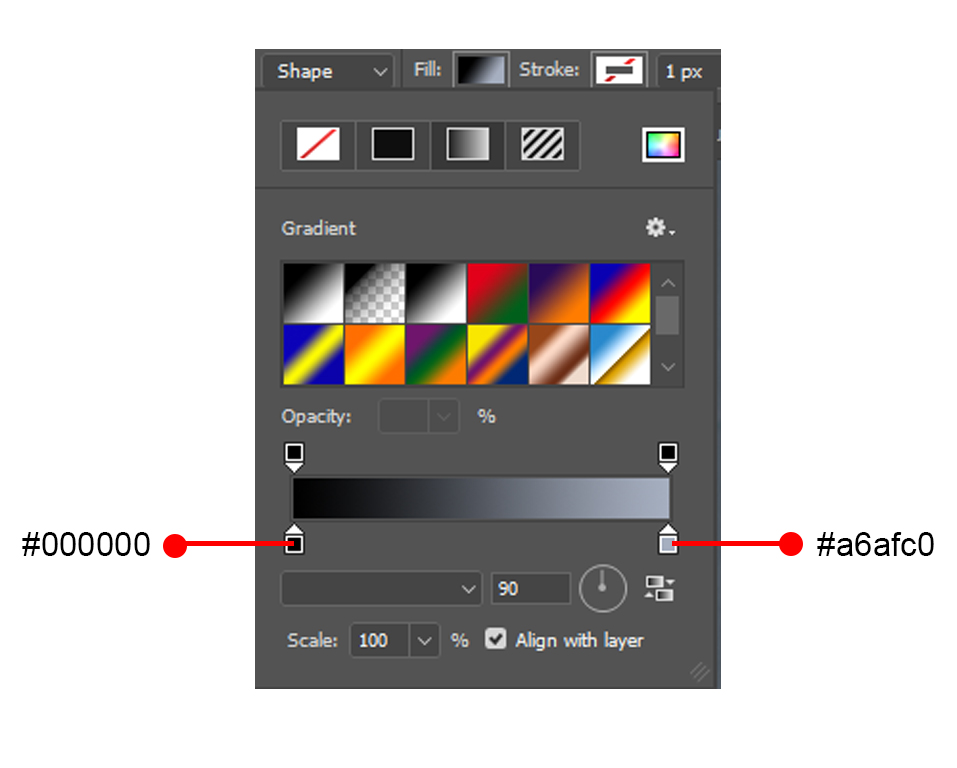
,Linear Gradient
Shades from the starting point (#000000) to the ending point (#a6afc0) in a straight line. I use eyedropper tool to get the color from the dark side of the collar suit for the ending point.
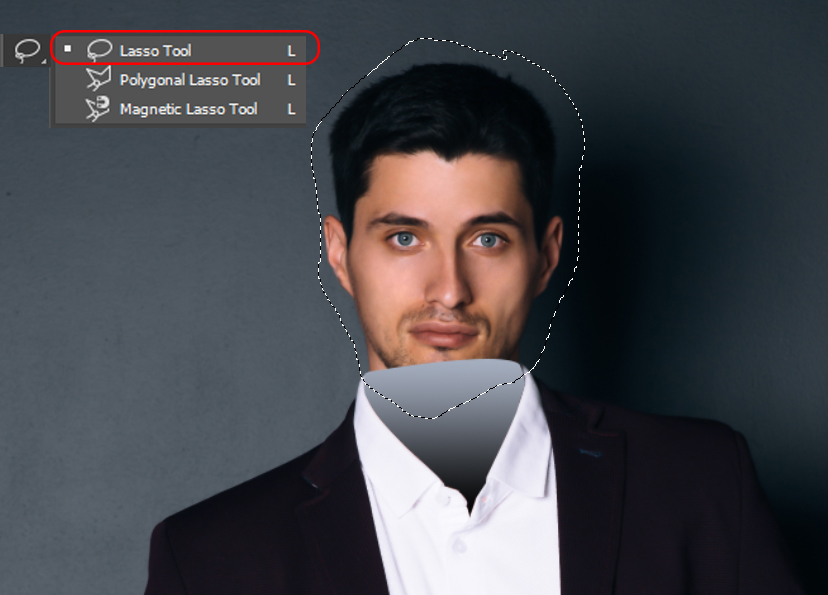
Step 3: Select Lasso Tool
I select Lasso Tool (L) and draw a selection around the man’s head.
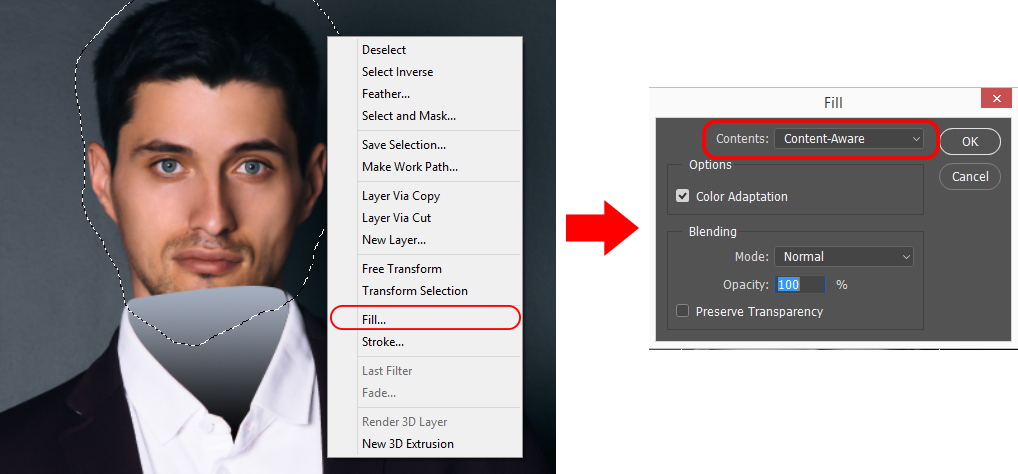
Step 4: Content -Aware Fill
Right click your mouse and select Fill or we could go to Edit / Fill (Shift +F5). In Contents, I choose Content-Aware then click OK.
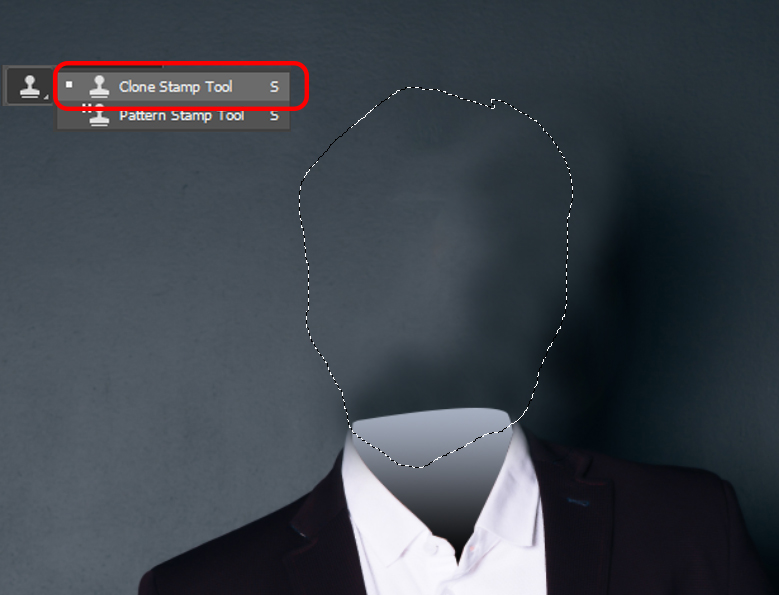
Step 5: Select Clone-Stamp
I select Clone Stamp (S) to clear the background cleaner.
With the Clone Stamp tool selected, position the cursor over the area you want to clone and then Alt-click (Windows) or Option-click (Mac) to define the clone source.
Position the cursor over the area where you want to paint the cloned pixels and then start painting.
Step 6: Move the smoke image to the picture
To make smoking head effect, we must open the smoke image and move it to the picture. Select Blend Mode: Screen.
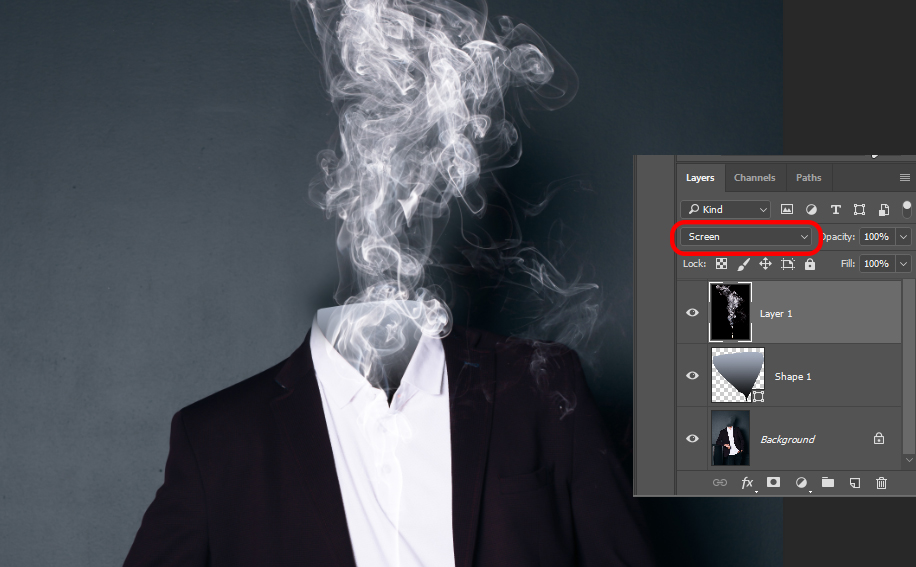
Step 7: Create Mask in Layer
Create Mask in Layer 1 and use brush tool to remove unused part by filling black color in layer mask.
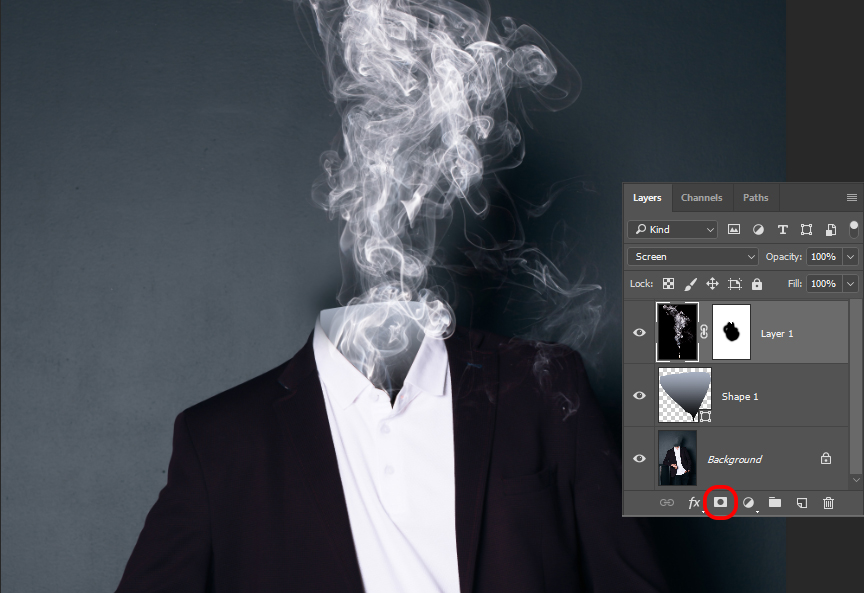
Step 8: Input the second smoke image
Continue, I open the second image and do the same as previous step. It will help us to increase the density of the smoke blowing up from the his body.
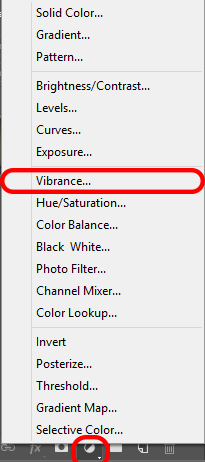
Step 8: Decrease the Vibrance
I create a Vibrance adjustment layer and decrease vibrance : -50
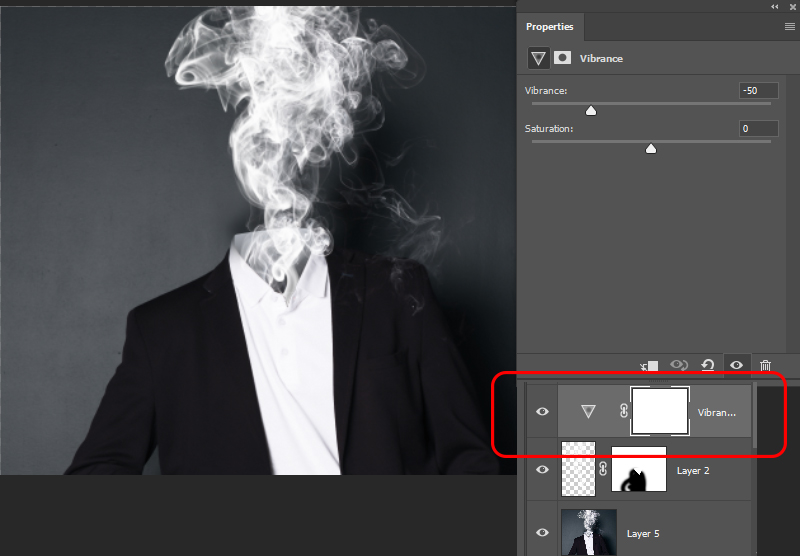
Step 9: Create Gradient Adjustment Layer
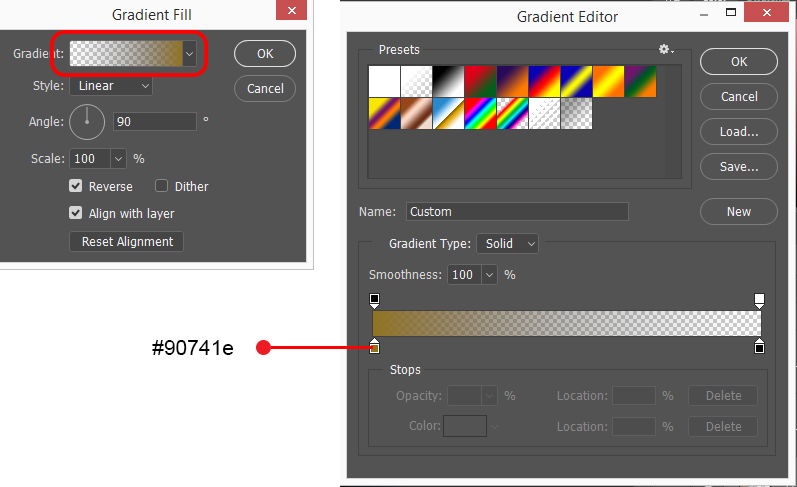
I create a Gradient adjustment layer. 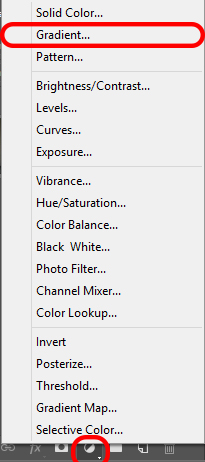
Style: Linear Gradient
Shades from the starting point (#90741e- dark yellow color)-Opacity: 100% to the ending point (#000000)-Opacity:0% in a straight line.
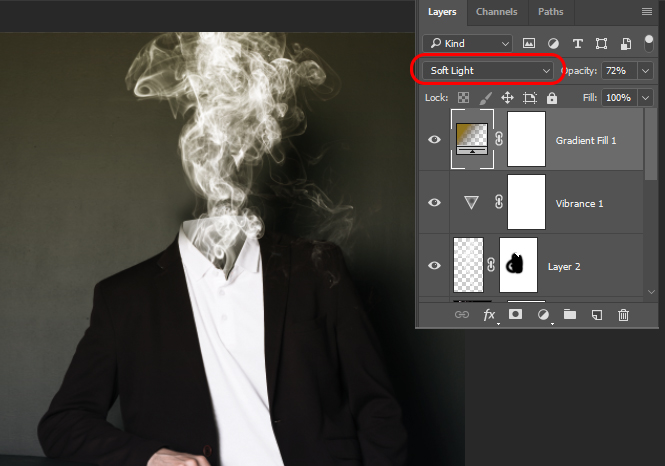
Select Gradient Layer and Choose Blend Mode: Soft Light
Step 10: Stamp all visible layers
Press and hold the Ctrl + Shift + Alt keys, and then tap the letter “e” (Mac = Command + Shift + Option, then tap “e”).
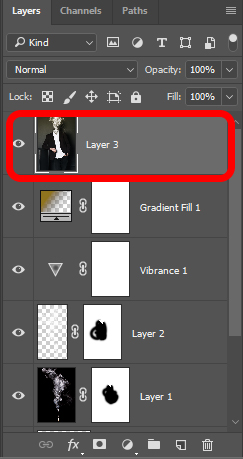
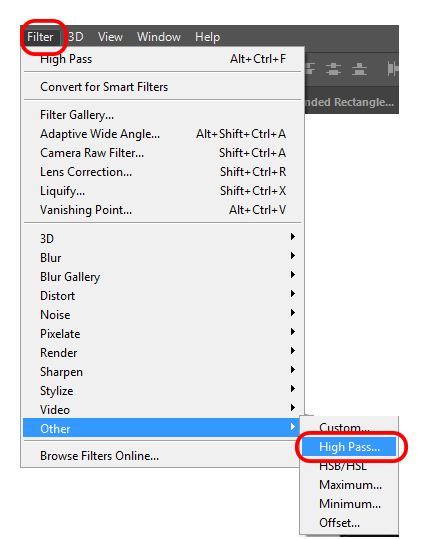
Step 11: Shapen the image
Select layer 3 and go to Filter / Other / High Pass
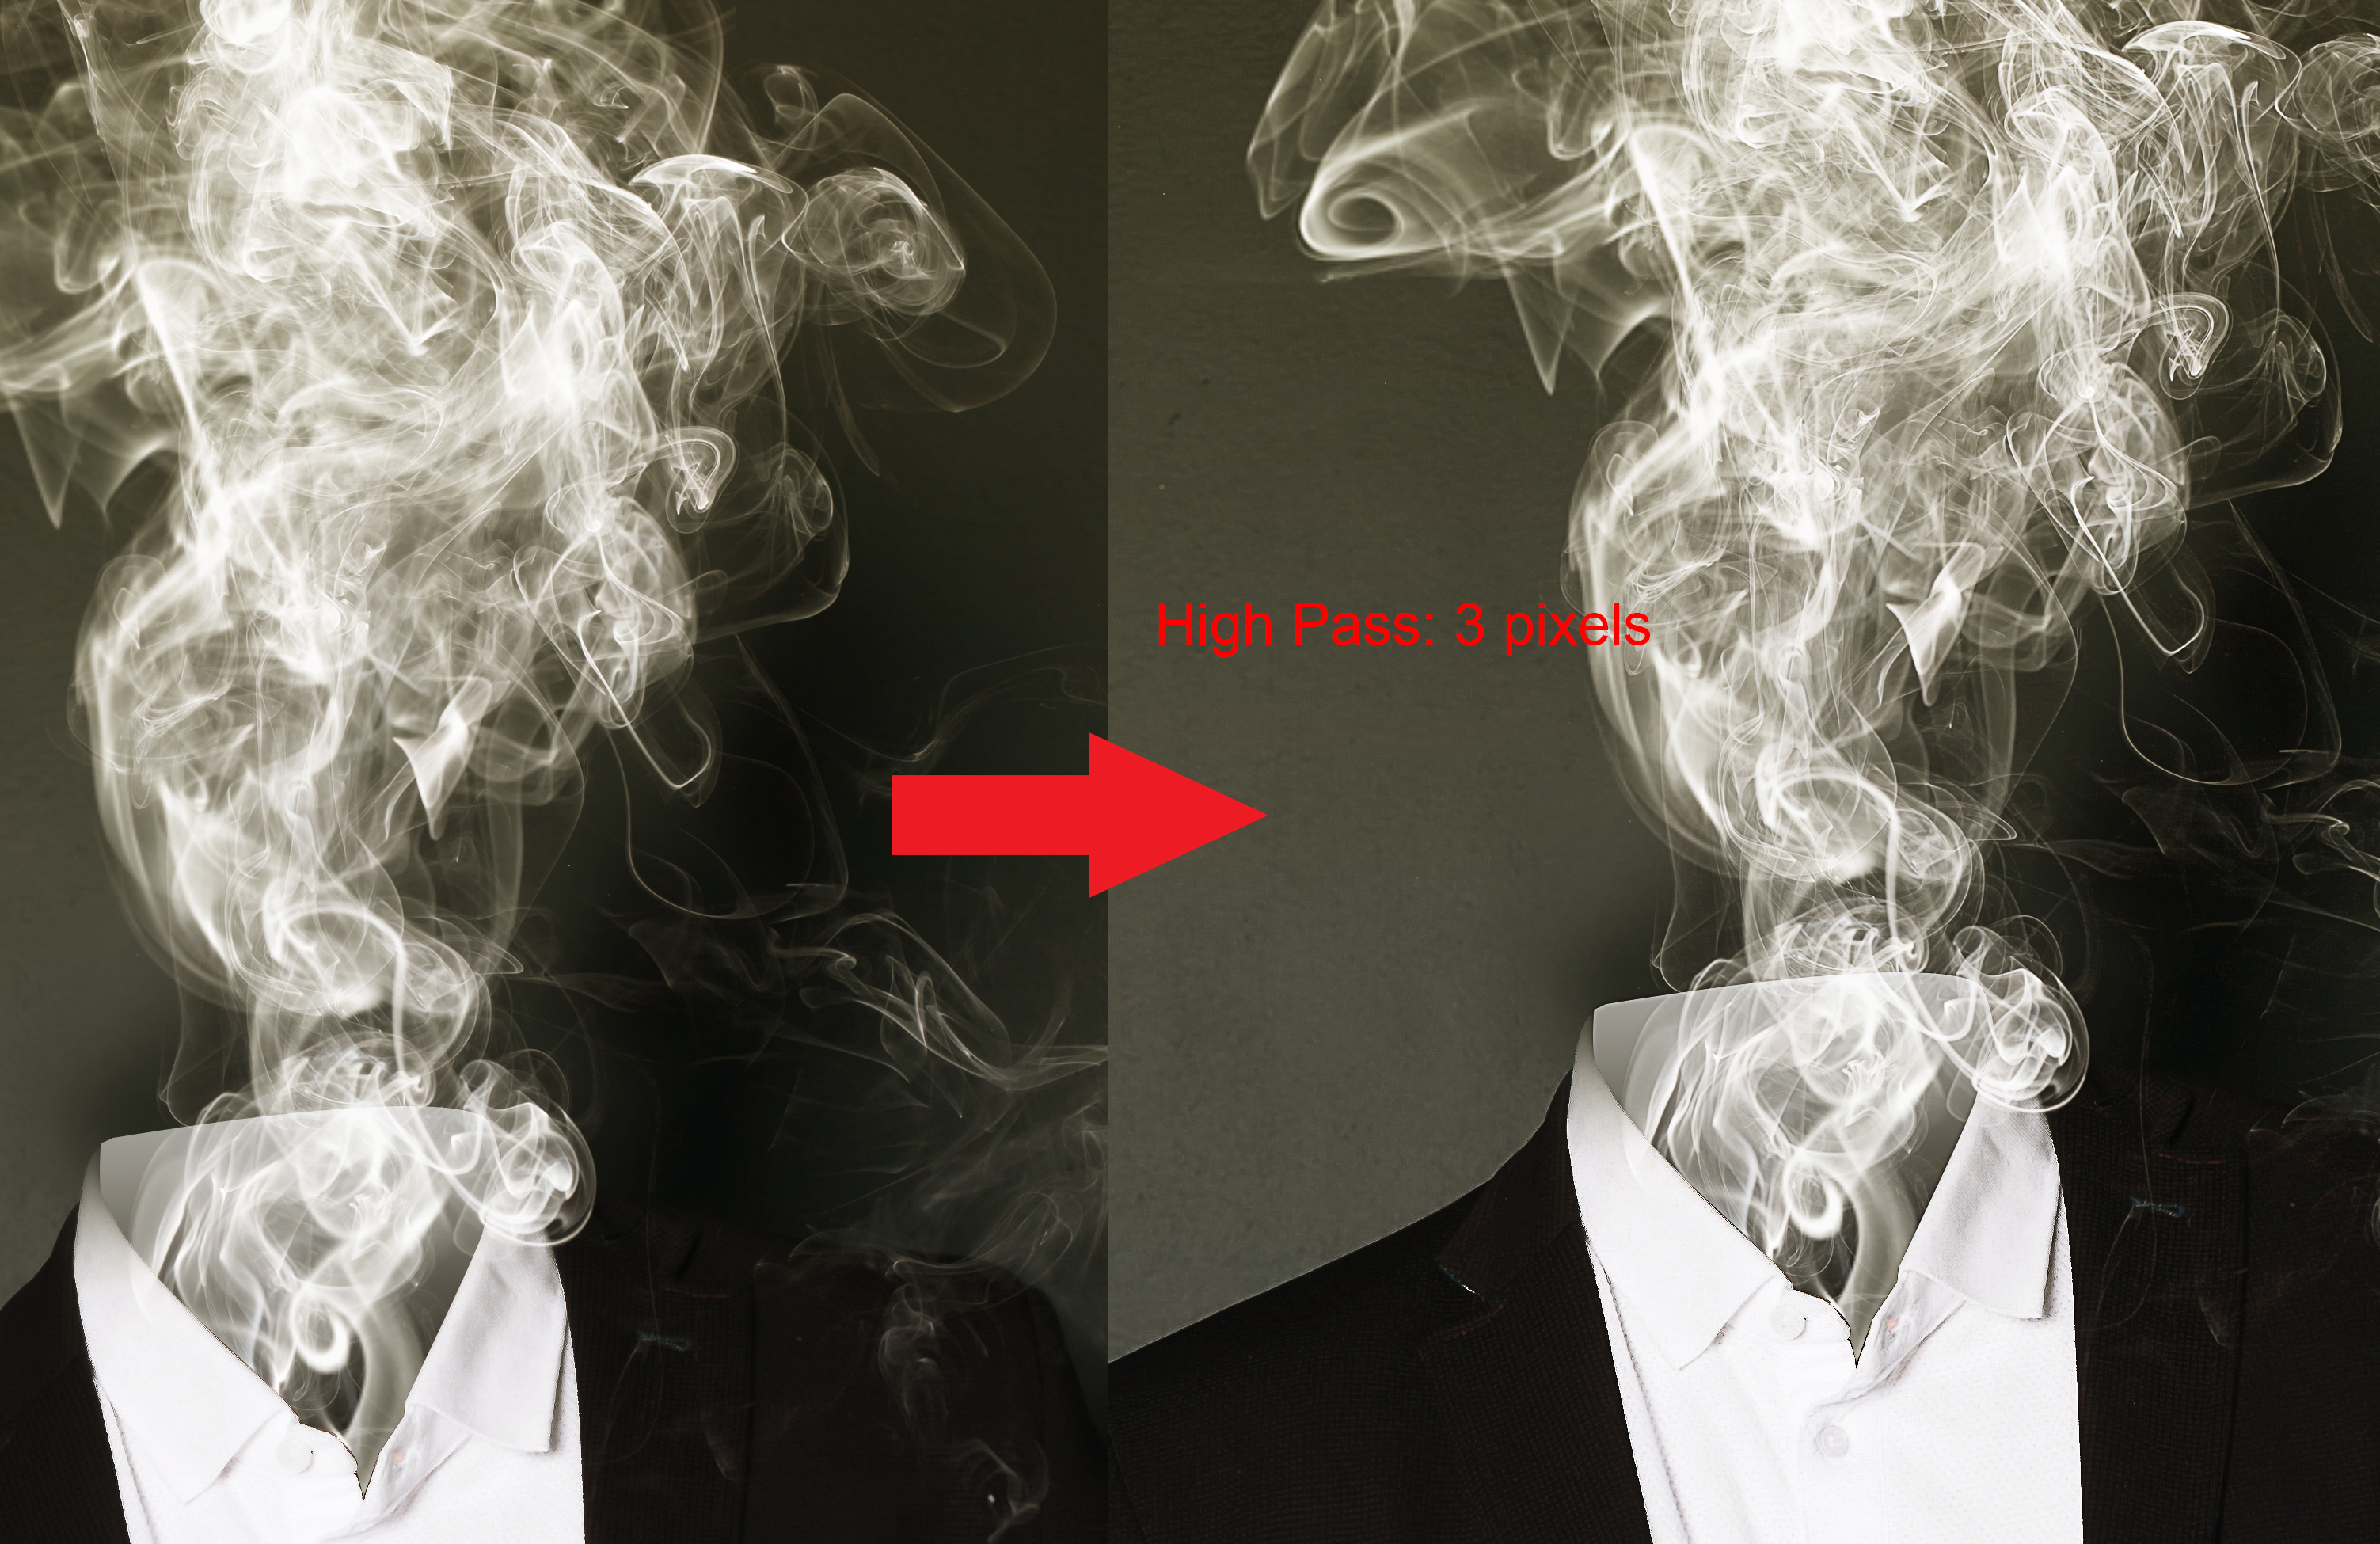
Radius: 3.0 pixels

Let’s have a comparision. We could see that the details has been much sharper.
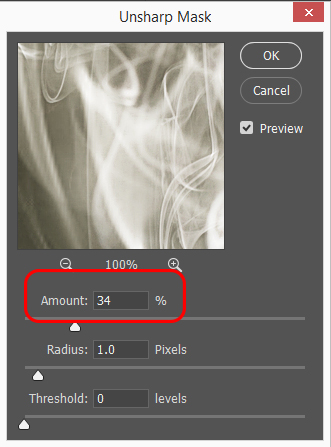
Continue, I hold Ctrl + Shift + Alt + E to stamp all visible layer. Then I go to Filter / Sharpen / Unsharp Mask
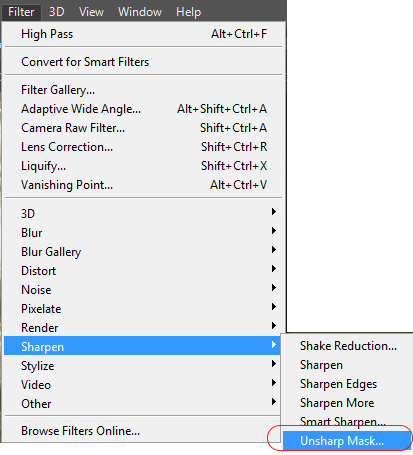
In Unsharp Mask,
Amount : 34%, Radius: 1 pixels
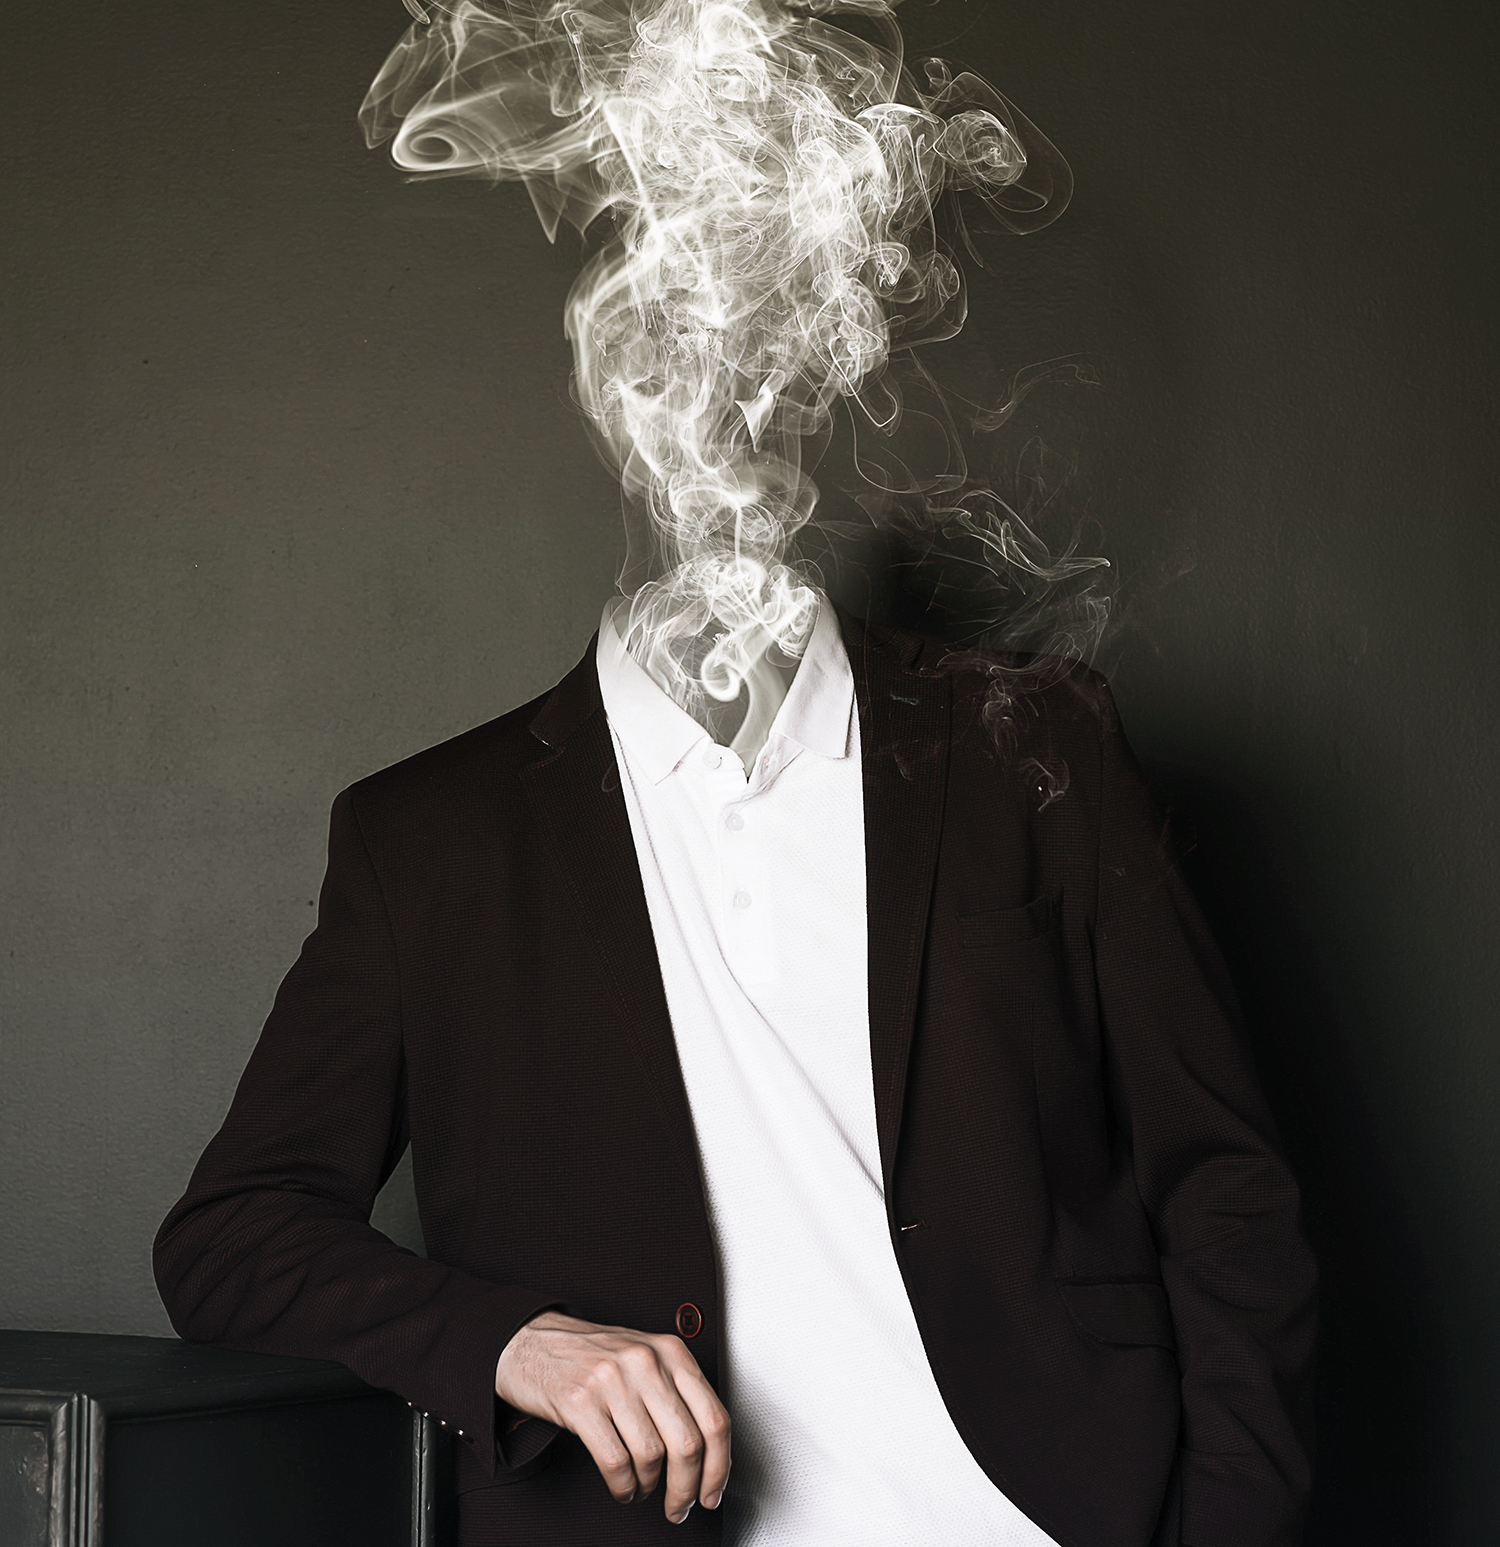
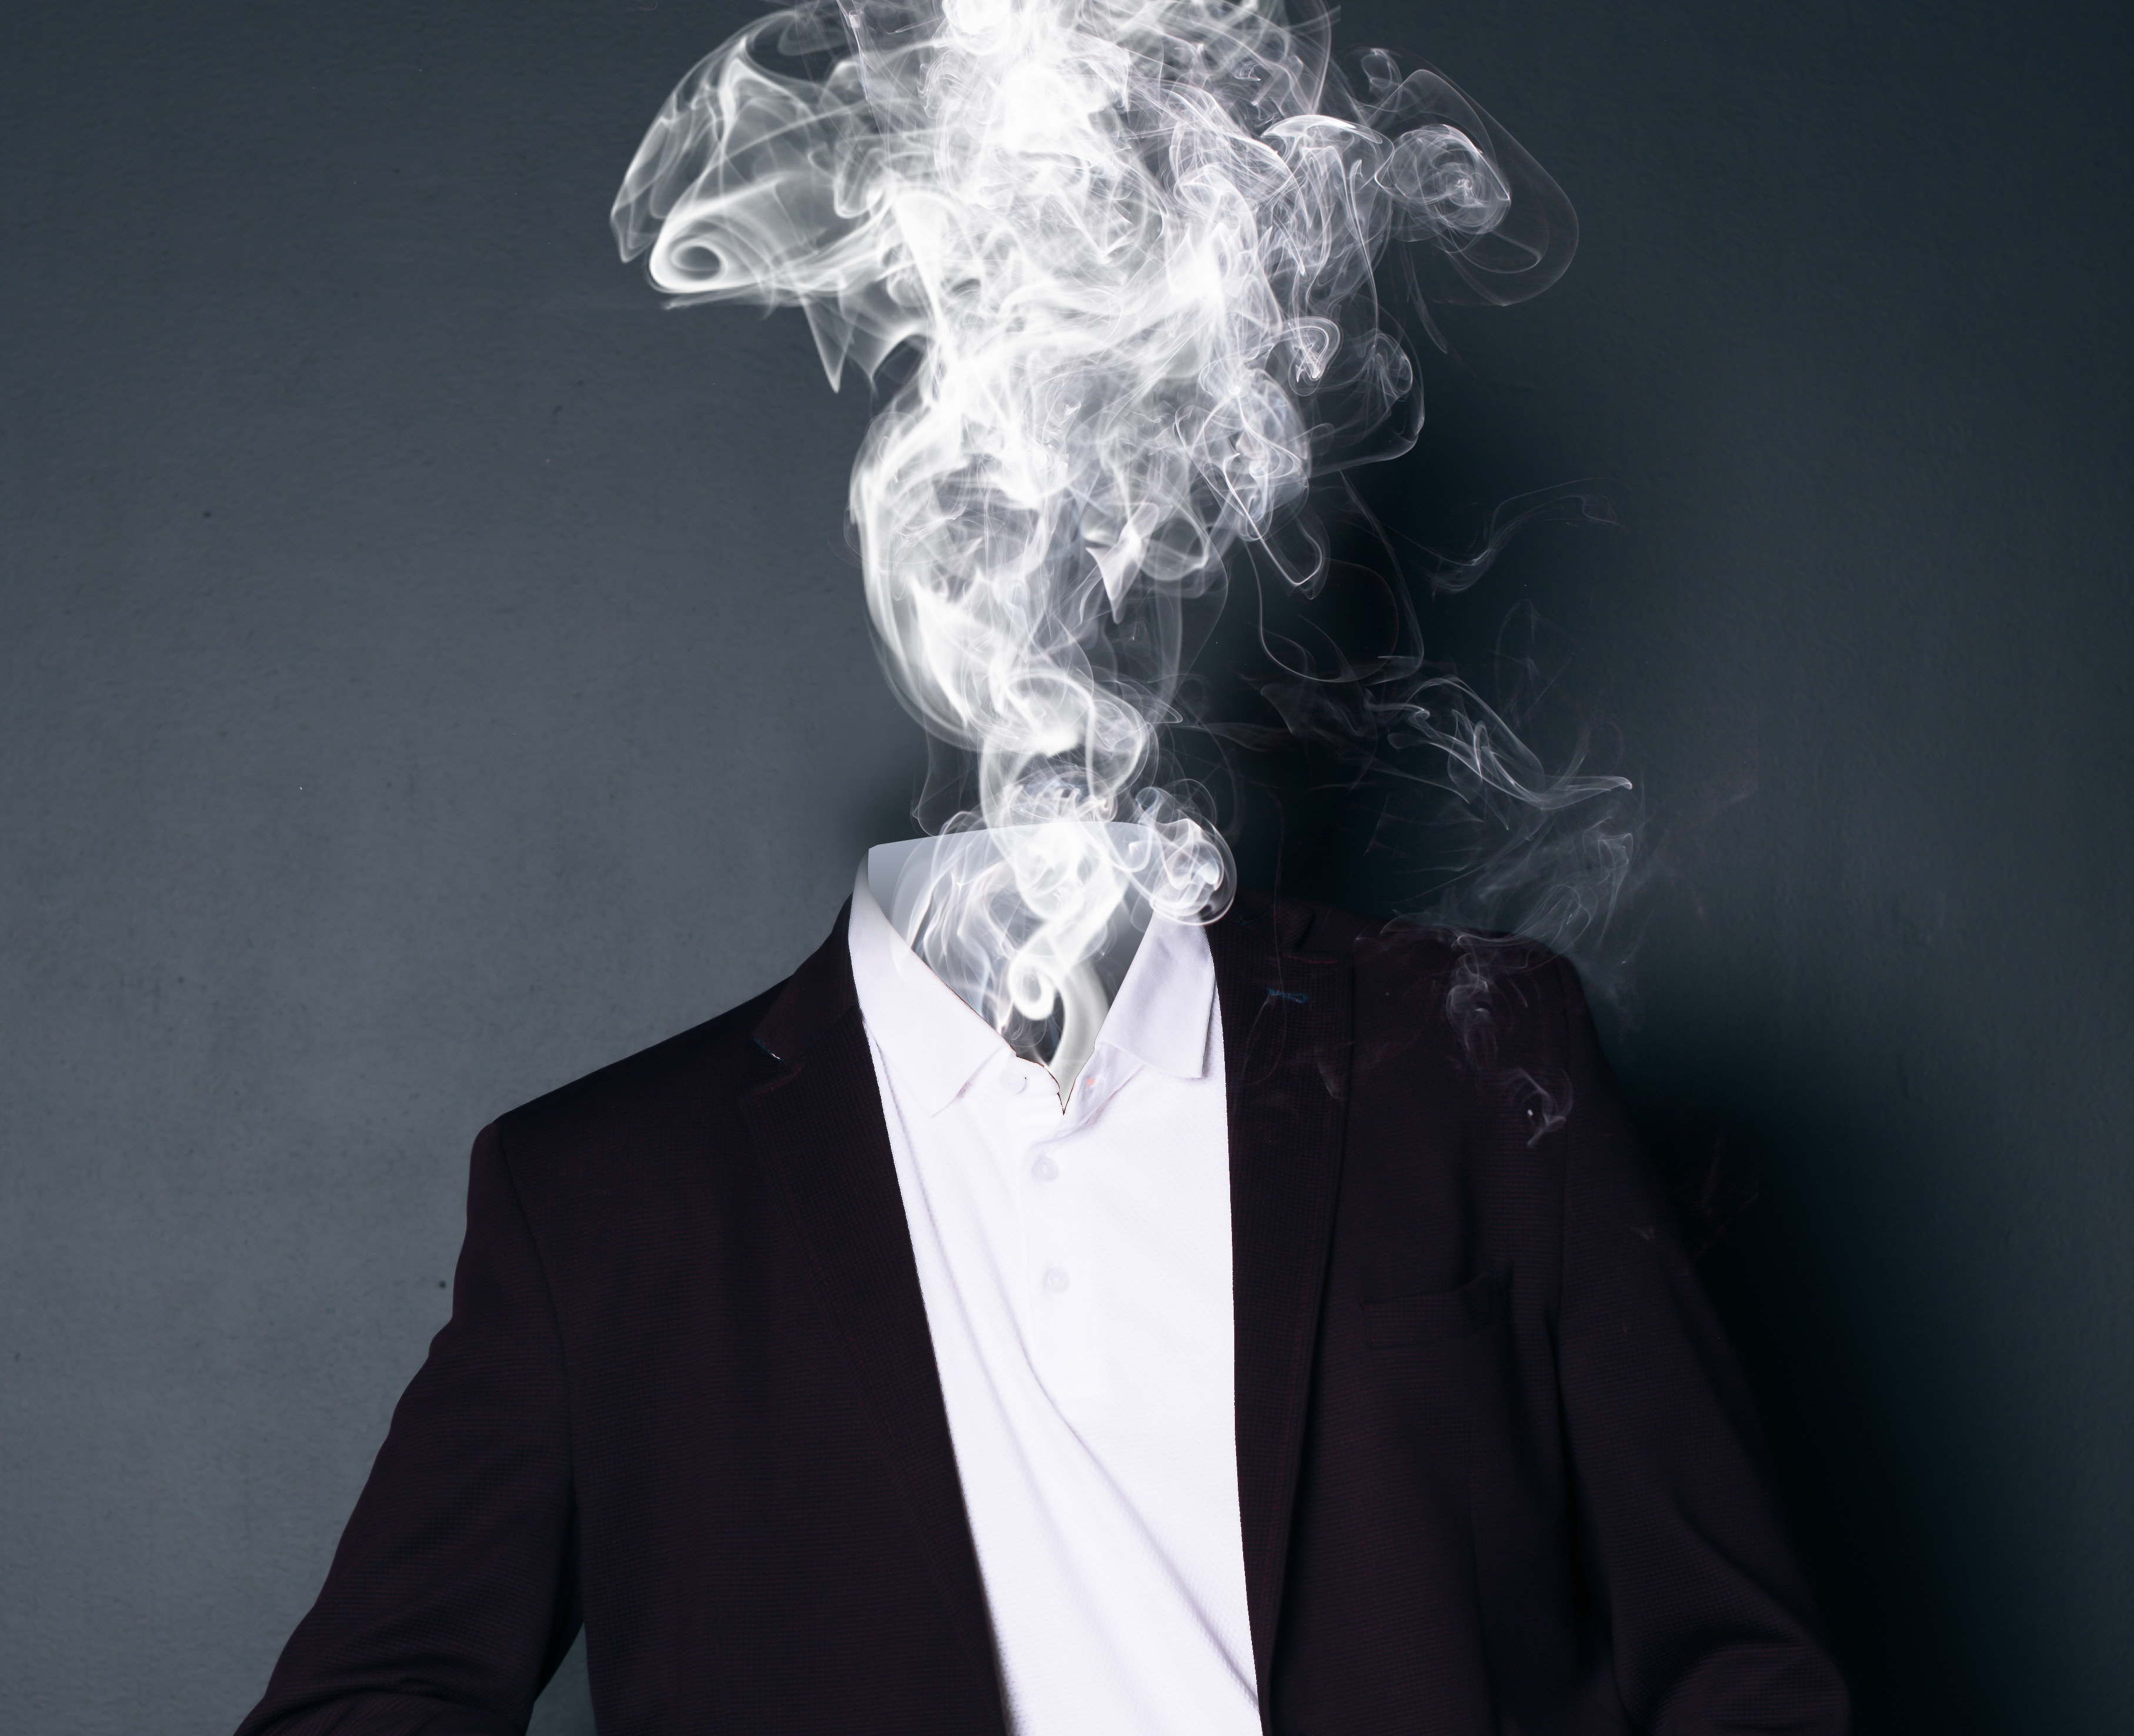
And here, with the detail now sharper, is my final result: