
Photoshop Tutorial: Dreamlike and Surreal Photo
Photoshop Tutorial: Dreamlike and Surreal Photo
How could we create a dreamlike and surreal photo like this? This picture is realy nice, isn’t it ? But you will realize that how easy it is to make it with simple steps. Pen tool, Lasso Tool, Brush Tool will be helpful in this tutorial.

Step 1: How to cut the woman from the background
You can choose the Pen Tool by pressing P on your keyboard or going over to the top of your Tool Bar, which is located at the left of your screen, and heading down seven tools until you reach it. To draw straight lines with the Pen, simply click in the area that you want to place your points. To draw smooth curved lines, hold down the left mouse button and drag the mouse in the direction of the curve, and then release the button.
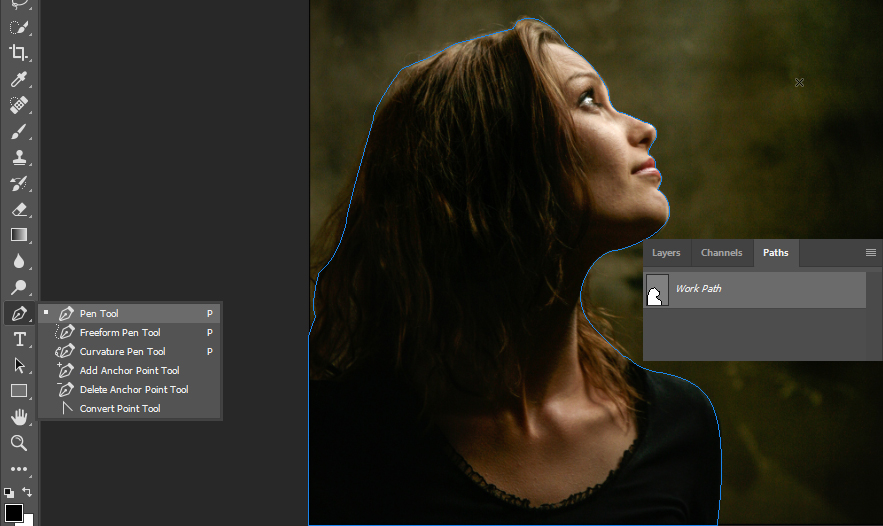
In order for your outline to be completely finished, your last point must connect with the first point that you made, which should now completely encircle your image.
After the line encircle the girl, we use Pen Tool to right click in the image and select Make Selection option.
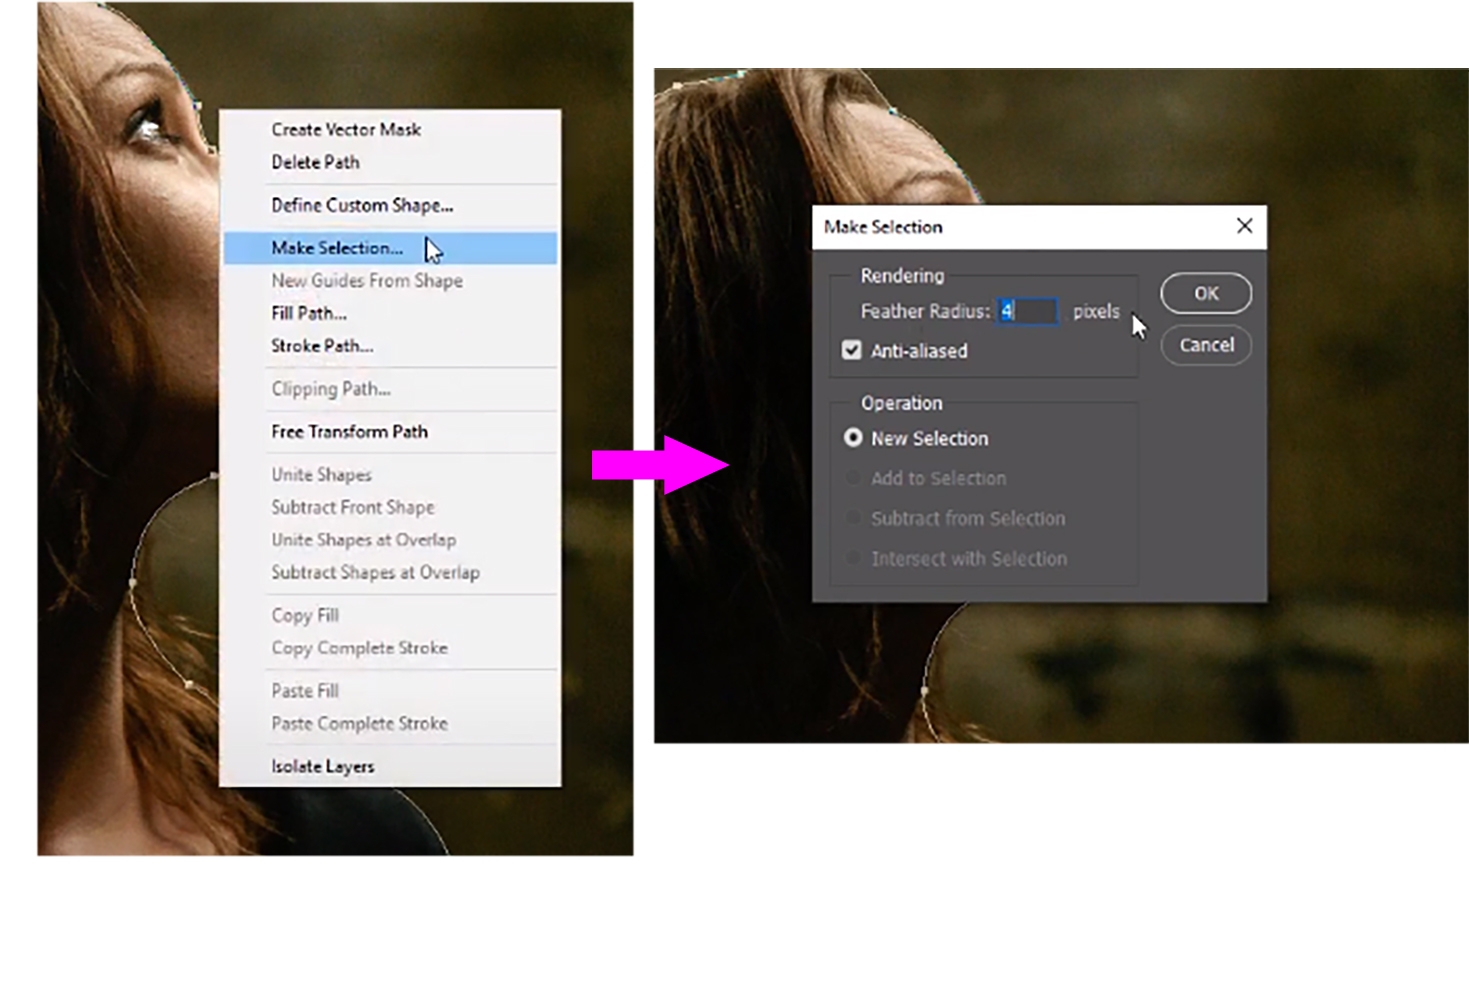
In Make Selection box, we type number 4 in Feather Radius and click Ok to finish.
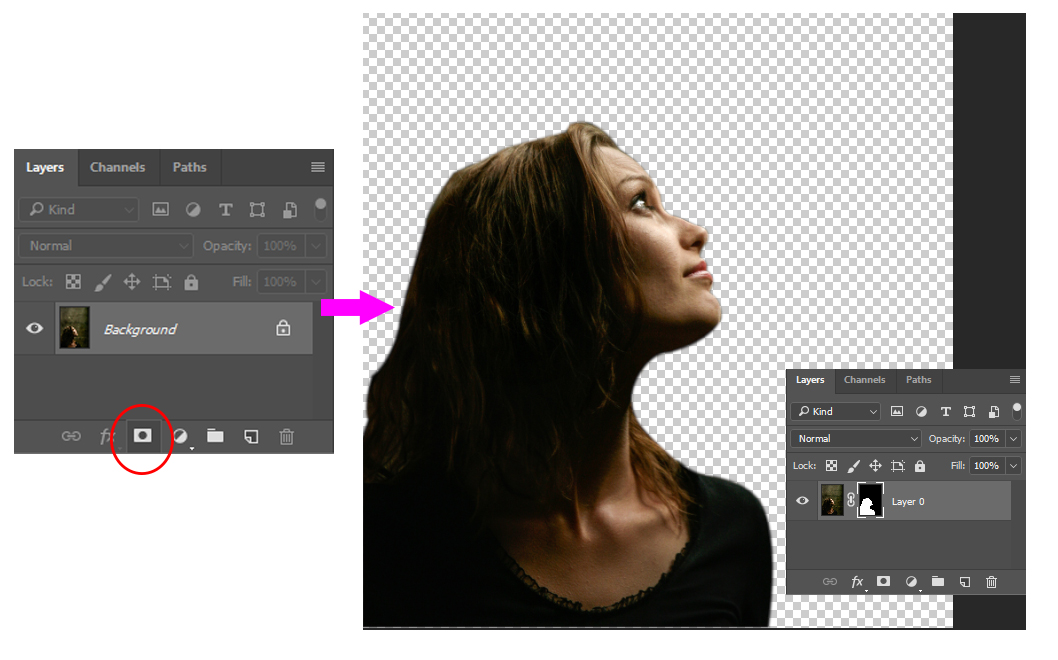
After we have the selection of the woman, we click in Mask button to create a Mask in Layer 0. Now the background has been removed.
Step 2: Crop the image with new background
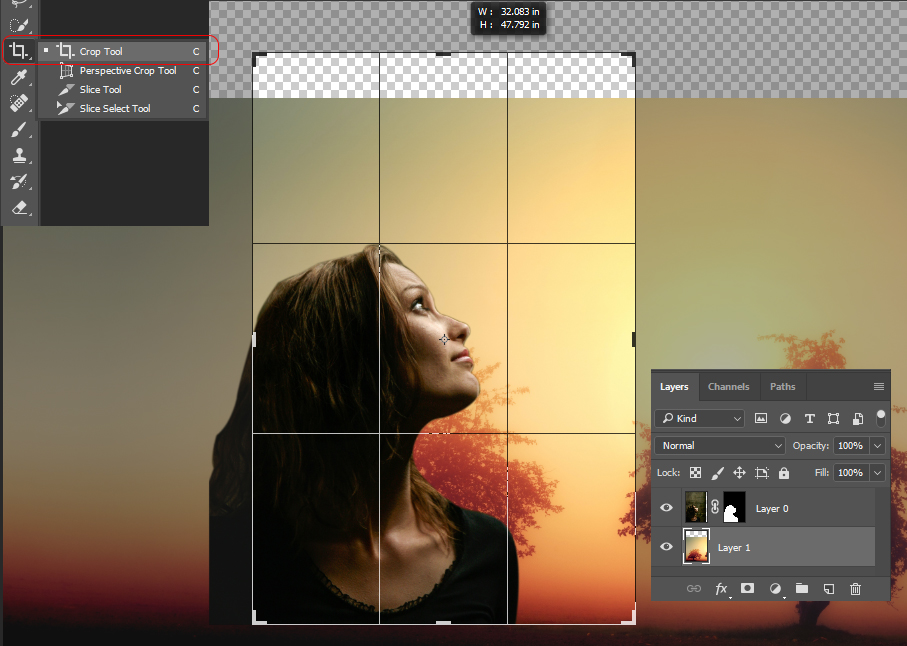
We go to File / Open (Ctrl / Command +O) and select the sunshine image. Then we make the image go behind the woman. We use Crop Tool (C) to resize the crop border.
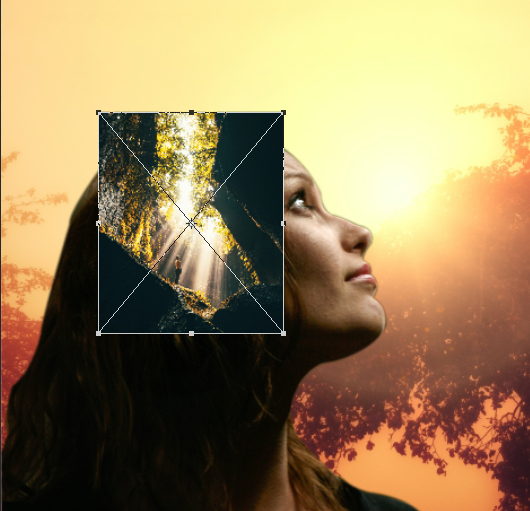
Step 3: Add the cave image.
Go to File / Open and open new image. Move the image to our picture and press Ctrl / Command + T (Free Transform) to scale it smaller.
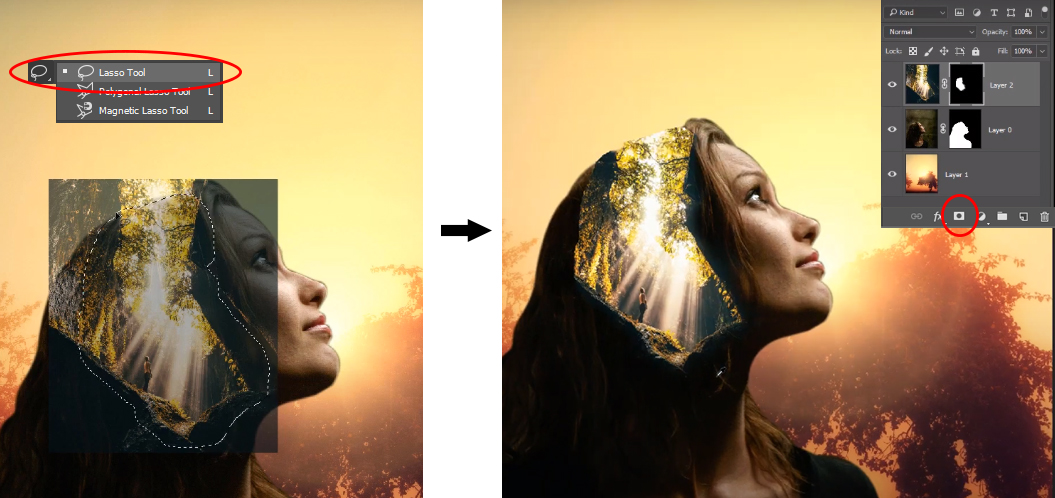
Select Lasso Tool (L) and draw selection around the new image. Then we click in Mask button to create a Mask of Layer 2.
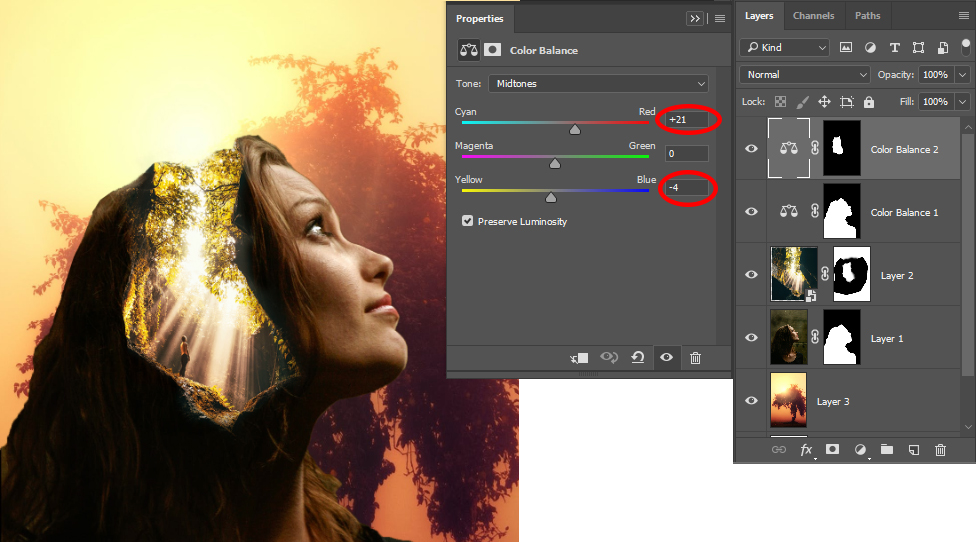
Step 4: Change color tone
After reselect the woman pixels, we choose Color Balance in adjustment and change color tones of the woman. Cyan: +18, Yellow: -7. Now the woman’s color tone has been matched with the background.

Next step, we change color of the cave image. Hold Ctrl / Command and click in Mask of Layer 2 to reselect pixels of the cave image. Then We choose Color Balance and change color. Cyan: +18, Yellow: -7.
Step 5: Stamp Visible Layer
Press and hold the Ctrl + Shift + Alt keys, and then tap the letter “e” (Mac = Command + Shift + Option, then tap “e”).
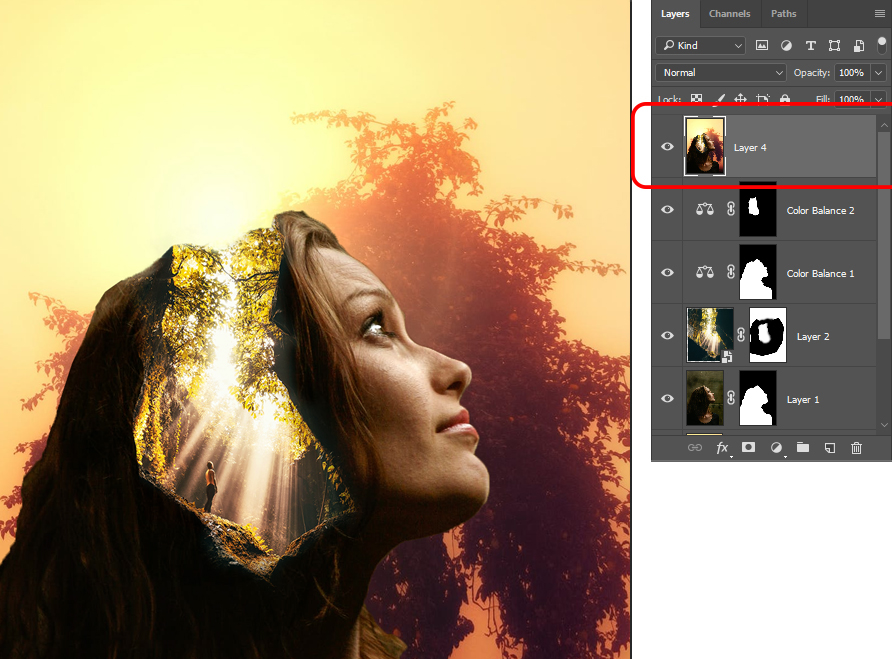
Step 6: Erase the boundary
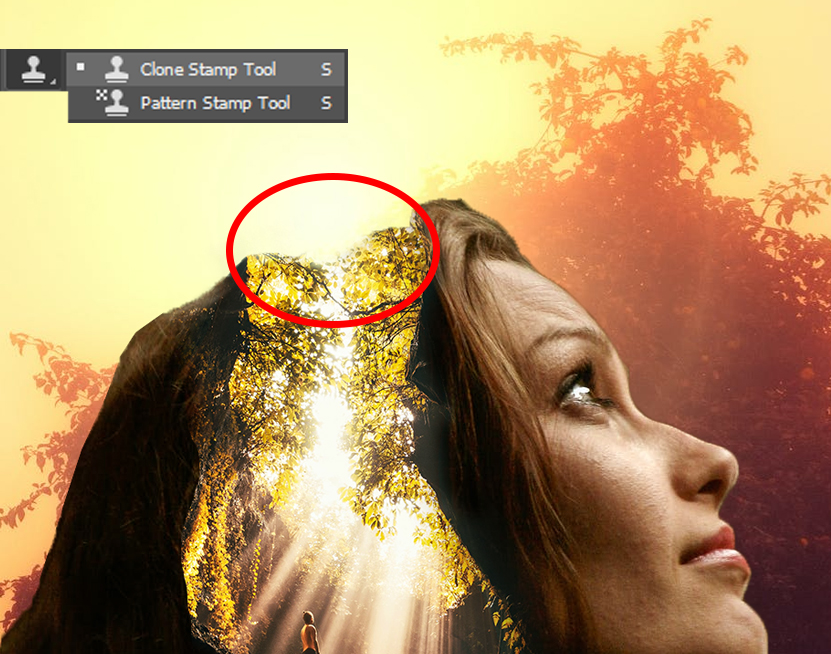
Select Layer 4 and use the Clone Stamp tool to erase the boundary between the two images. When using the Clone Stamp tool for touching up images, you should resample many times so as to not leave a seam where you replaced pixels. A good clone stamper Alt-clicks (Windows) or Option-clicks (Mac) and paints many times over until the retouching is complete.
Step 7: Add the birds image
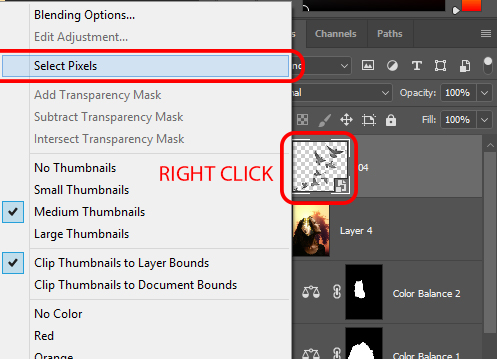
I go to File / Open (Ctrl / Command + O). I open the birds image and right click in birds thumnail to choose select pixels.
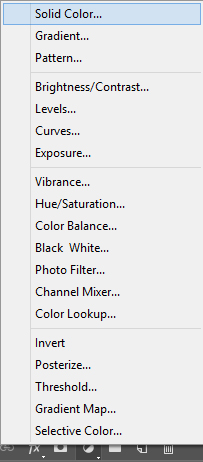
Then I fill black color with Solid Color adjustment layer.

And here, with these simple steps, is my final result:
The final result.